We hope you have enjoyed our takes on scrapping in a foreign language and now on to Darlene!
Deb♥

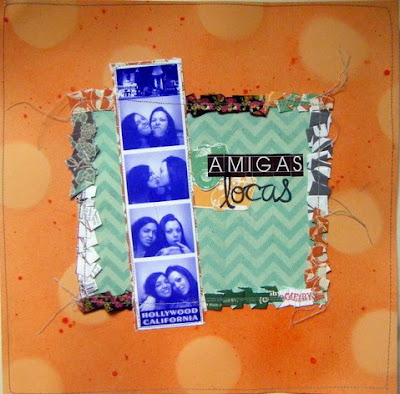
I made a super easy layout of a fun photobooth photo from November 2010, of my best friend, Nicole, and me, back when I was visiting her in California. This was our last day together and we went to Hollywood to explore for a bit. :) My title "Amigas Locas" means "crazy friends", and that sums our friendship and these photos up pretty well! :)
I never really knew how to scrap this photo until I came upon a beautiful designed layout by Tessa Buys (http://precociouspaper.blogspot.com/2010/07/tough-one.html) and just knew I had to lift the sketch! Isn't the negative space and various elements so interesting?
For my take on this sketch, I cut a rectangle mat for the center, and then I used 2 sheets of double sided patterned papers and cut 2 12x1/2 inch wide strips of each paper, using alternating patterns of the paper, for use on my center pleated frame. Once I was settled on which paper would be next to what, I pleated and sewed the pleats down to secure them permanently, and I left the loose sewing threads untrimmed (I rather like that look. :))
For my background paper, I used a plain orange sheet of 12x12 paper and I punched about 12 or so 2-inch circles with a circle paper punch out of scrap paper. I placed the circle punches scattered on the background paper, just allowing them to stay hoovered above the background with no adhesive (you may use removable adhesive if you prefer for this). I then used orange misting to spray the circles from up top, as to keep the shapes of the circle masks. I made some areas darker with mist than others and tried to get that blotched look throughout some spots as well. When I was satisfied with the misting work, I removed the circles and I was left with a super neat polka dot pattern on my background. Then I finally applied my center mat and frame and layered my photo and title on top. Lastly, I straight sewed the edges of my orange paper as well as sewed the edges of my photo down to the layout.
You can knock a layout like this out in less than an hour, and it is so fun!


No comments:
Post a Comment